Today I stumbled on a simple and flexible way to host a static site using Google Cloud Storage and Cloudflare. This isn’t very well documented so I wanted to write it up.
DNS
First, as with (almost) any Cloudflare configuration, you’ll need to configure Cloudflare as your DNS provider. Cloudflare makes this very straightforward, so I won’t cover this here; just sign up for a Cloudflare account and follow their built-in onboarding flow.
Cloudflare will attempt to migrate existing records, so if your site is already hosted elsewhere this shouldn’t cause any downtime.
Domain Verification
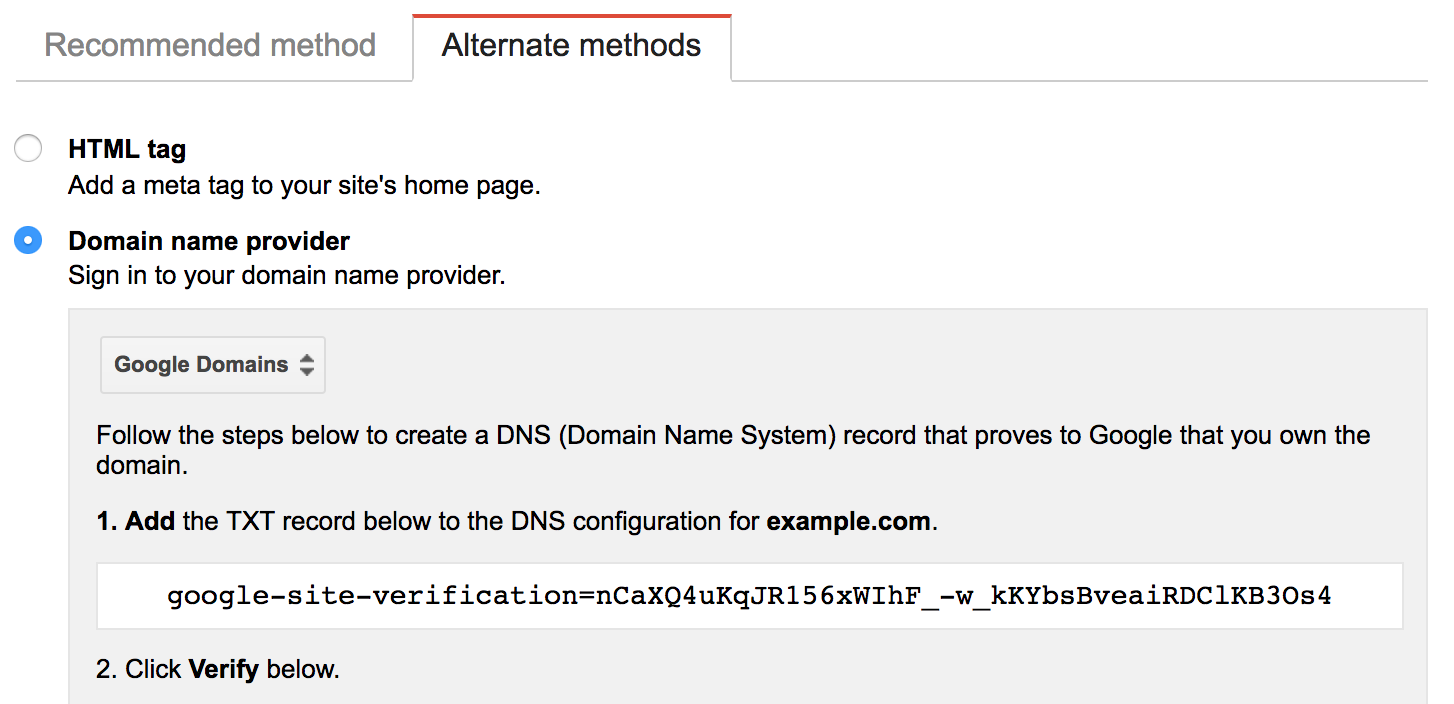
Before you can proceed you’ll need to verify that you own your domain using Google Webmaster Tools.
Enter your domain into the tool, select the “Alternate methods” tab, then select “Domain name provider”. You can choose any provider from the list, just grab the value for the TXT record.
In another tab log in to Cloudflare, navigate to DNS, then add a new record:
- Type:
TXT - Name:
@ - Value:
<value-from-google> - TTL:
Automatic
Once the record is added return to Google Webmaster Tools to complete domain verification.
Bucket Setup
Within the Google Cloud control panel, create a new bucket whose name matches the DNS name of your site (ie, russellhaering.com). You won’t be able to do this if you haven’t completed the verification step above.
I chose the multi-region storage class at 2.6c per GB. Since it will be behind Cloudflare you could probably use single region to save .6c per GB.
If you don’t already have it, download, install and initialize the Google Cloud command line tools.
Change the default object permissions on the bucket to be readable by anyone by running:
gsutil defacl ch -u AllUsers:R gs://russellhaering.com
Now, sync your site up to your bucket by running this from the root of your static site:
gsutil -m rsync -r -d . gs://russellhaering.com
And configure index and 404 pages:
gsutil web set -m index.html -e 404.html gs://russellhaering.com
At this point, you can test your site using curl with a manual Host header:
curl -H 'Host: russellhaering.com' https://c.storage.googleapis.com
You should see the contents of your index.html returned.
Turn It On
Finally, to cut over to your new site go back to the Cloudflare DNS page and add another record:
- Type:
CNAME - Name:
@ - Domain Name:
c.storage.googleapis.com - TTL:
Automatic
Cloudflare will apply their “CNAME flattening” here because DNS normally requires an A record at the root of a zone.
Your site should now be being served through Cloudflare from your Google Cloud Storage bucket. You can sync new content into your bucket any time by running the gsutil rsync command used above again.